Why can’t I log in to the Wifi.wavlink.com device?
A user who can’t log in to the Wifi.wavlink.com interface of the Wavlink range extender can’t make any changes in the settings or features of the device. There could be numerous reasons because of which a user faces failure in the log-in issue. If you are facing any issue related to the setup or configuration process, you can contact the support team, we are available for you at any hour of need. Here are the troubleshooting steps that may resolve the wifi.wavlink.com issue Physical Connection The Web utility page of the Wavlink range extender is created through an in-built server with which a user can interact without an Internet connection. A Wi-fi connection is not necessary to interact with the web management page, but a physical connection is required to login to the Wavlink web management page. Without a proper physical connection, you cannot connect to the wifi.wavlink.com interface. Make sure the wires are connected properly to the range extender and the router. Wireless Connection for wavlink extender setup If you have created a wireless connection between the extender and your computer, make sure that the computer or mobile device is within the wireless range of the range extender. You can ensure the wireless connection between the range extender and your computer by checking the wireless LED of the device. If the Wavlink device you are using doesn’t have the LAN port, connect it through the wireless network using the default wireless settings given on the back of your device. IP address information If the DHCP function is enabled in your Wavlink device, it means the IP address to your computer will get assigned automatically. The computer device is assigned with the IP address by the Wavlink device that will be used to access its web interface. Make sure that the IP address you are using to access the web management page of the Wavlink device is correct. If this is the case, you need to set up a manual IP address for the computer that will be utilized to access the web management page of the Wavlink device. Firewall Settings For New Wavlink Extender If the firewall and antivirus software is enabled in your computer with which you are trying to access the wifi.wavlink.com interface, you may have to disable them. An active firewall may be a reason that you are not able to log in to the web management page of the Wavlink device. If possible, try a different browser or computer to access the Wavlink device In some cases, replacement of device or removal of anti-virus software is also needed. Browser settings An abnormal browser setting may also lead to failure in the login process of the Wavlink web management page. It may be the reason that the cache memory or downloaded history got so much piled up in the browser that it is denying you from accessing the Wifi.wavlink.com interface. Delete piled-up history using the settings tab of a browser. Note: If all the above troubleshooting steps fail in resolving the wifi.wavlink.com issue, you need to restore the default settings to the Wavlink device. Press and hold the reset button for around 10 seconds located at the back panel of the device. Release the reset button when the LED of the device stops blinking. The Wavlink device automatically reboots when the reset process gets done.
wifi.wavlink.com – How to set up a Wavlink device in a home network?
The setup process of a Wavlink range extender could be done through a computer using the web management page or through a mobile device using the Wavlink Tether app. For a new user, it is generally recommended to perform the setup process using the web interface of the device. You can learn various features while configuring the Wavlink range extender. Steps to perform the setup process of the Wavlink range extender
- Unpack the range extender and adjust its antennas.
- Note: You can take the help of the Quick setup guide that came with the range extender.
- Connect the range extender to a power outlet near the main router
- Once the range extender turns on, move on to the computer or mobile and turn on its Wifi.
- Scan for the available Wi-fi networks near the range extender
- Connect to the Extender’s Wi-fi network using the default wireless settings.
- Note: You can find the extender’s default Wireless Settings on the back of your device
- Make sure you apply the correct details, otherwise you won’t get connected.
- Once you get connected to the extender’s network, open a browser on the computer.
- Type 192.168.10.1 or wifi.wavlink.com in the address bar of the browser.
- Hit enter and the configuration page appears on the screen.
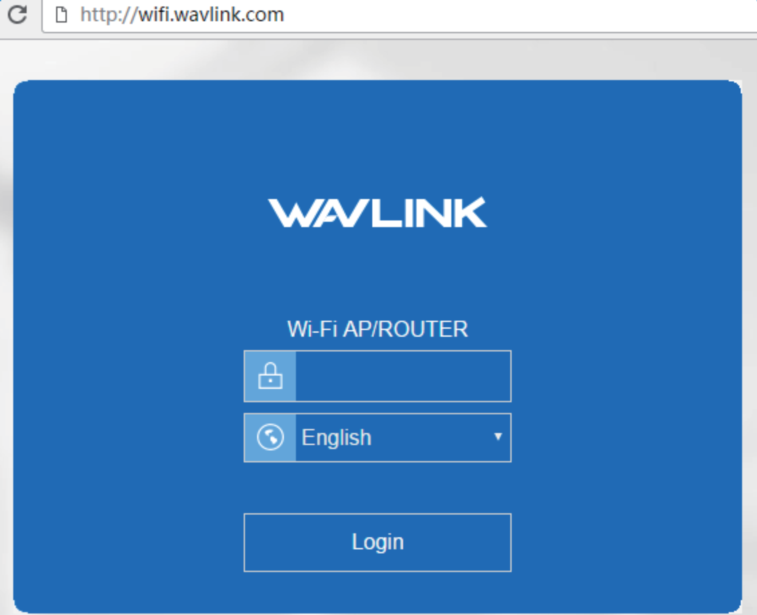
- Type down the default login password in the provided field and hit Login.
- The default login password of the Wavlink range extender login window is “admin”.
- Assign the Time zone from the drop-down list. It is based upon the region from where you are operating the extender.
- Click Next when you get done.
- Personalize the Wi-fi settings by assigning a new Network Name and Wi-fi password.
- If you want to apply the same Wi-fi password to both the Wi-fi bands, select the “Use the same password for both the networks” option.
- Mention a security level to the network.
- Do not assign an open security level to the router. It creates a blockage for unknown users to deny you from accessing the network.
- Once done click Next.
- Now review the settings you made with the help of the summary page.
- Click Finish.
- The range extender initiates the reboot process to apply the settings you made.
- Wait for a couple of seconds to let the process complete.
- Once done, go to the desktop and connect to the extender’s network using new Wireless settings.
Note: Once the setup process gets done, you can configure other features like Access Control, Time settings, Parental Control, Traffic Meter, Smart connect, and many others to gain the performance level of the range extender. Regularly change the login password to keep the unwanted users away from accessing the extender’s network.
How to change the Wi-fi password of a Wavlink router?
The Wi-fi password of a router is different from the login password. The Wi-fi password is used to access the router’s network whereas the login password is used to interact with the wifi.wavlink.com interface. Without a Wi-fi password, no one can access the Wi-fi connection of the router’s network. Usually, the wi-fi password is configured during the Wavlink setup process. Steps to change the Wi-fi password of a Wavlink router
- To change the Wi-fi password, open the router’s configuration page.
- Launch a browser and type 192.168.10.1 in the address bar of the browser.
- Note: Make sure that the computer or mobile device is connected to the Wavlink router’s network.
- The default Wavlink login page appears.
- If you haven’t changed the default admin settings, enter the “admin” for both the username and password.
- You can change the default language of the web management page from the below drop-down list.
- Click login
- Both the username and password fields are case-sensitive.
- Go to the Wi-fi tab, select the Settings tab then click on the Wireless settings tab.
- Assign the desired SSID name and Wi-fi password to the respective networks.
- Note: Make sure that the network names of
- You can also change the Wi-fi channel.
- When all the configurations are made, click Apply when you are done.
- Wait for a few seconds till the settings are being applied to the router.
- both the Wi-fi bands are different so that a user can easily identify the Wi-fi with which he is connected.
- You can also change the Security type of the network through the wireless settings page.
- Note: WPA/WPA2 is strongly recommended as the security type of the network.
How to update the firmware of a Wavlink router?
The firmware update is necessary for the proper performance of a Wavlink router as a new firmware improves the functioning of the features and security of a device. Before interacting with the web interface of a Wavlink router, you need to visit the Wavlink Download center to download an available firmware. Check the packaging box to note down the correct model number and product name of the Wavlink router.
Note: Read the release notes of a new firmware you are downloading, it gets downloaded with the firmware file.
Here are the steps to update the firmware of a Wavlink router
- Visit the downloading center of the Wavlink router.
- Mention the model version and product name in the respective fields.
- Click Download when prompted.
- Save the downloaded firmware file on the computer
- Remember the location where you saved the downloaded firmware file
- The download file might be in the zip format. Extract the file using WinRAR or Windows Extractor.
- Open the Wifi settings of the computer and search for the available networks.
- Connect to the Wifi network of the Wavlink device.
- You will be automatically redirected to the Wavlink management page.
- If you are not redirected to the configuration page, type wifi.wavlink.com in the address bar of the browser and hit enter
- You can also 192.168.10.1 as the URL of the browser.
- The default Wavlink login page appears.
- Enter the login password you typed earlier during the login process.
- If you are logging in for the first time, type “admin” in the password field.
- The web menu Dashboard of the wifi.wavlink.com appears.
- From the main navigation panel, go to the Advanced tab, select the Update option.
- Click Browse and navigate the cursor to the location where you have kept the downloaded firmware file.
- Select the file and click Upgrade to begin the update process
- Wait for the progress bar to reach 100% and when the process gets completed follow the remaining steps.
- Do not interrupt or power off the router in the middle of an update process.
- When the update gets completed, the router automatically reboots.
- When the router turns on successfully reconnect to the wifi and visit the web interface of the device.
- Go to the Status tab and confirm the installation of the firmware.
Note: If you are using a manual method of updating the firmware, make sure you are typing down the correct Model version and the product name in the respective fields. A wrong firmware may corrupt the update process and may void the warranty of the Wavlink router.
How to change Rockspace wifi Extender Password?
There are so many who want the Rockspace wifi extender change password for so many reasons. Also the main cause to change the password is for safety purpose. To defend their network forms others. Whilst we use the range extender’s web-based setup page, there you observe the login page will show prompt for a password. From company by default, range extender’s admin password is admin. We suggested changing it for safety purposes.
Steps to change password
Follow these underneath steps carefully
- Firstly you require to launch any web browser from your device to log in to the web-based setup page of your range extender.
- Then in the address bar type http://re.rockspace.local or enter IP address 192.168.0.254 and clack enter.
- Here you will observe ‘the log-in page appears to enter your default username and password.
- Once all this is completed then clack on ‘log-in’ and press enter, web page setup will show.
- After that go to Administration and clack on Management.
- Now type the password you desire to set as your range extender password and re-enter the password.
- Finally click to save and your Rockspace range extender is effectively changed.
This is the best and the simplest method to change passwords.
Changing the password on the RackSpace Wi-Fi extender is very simple as you can observe. However, many people put off the task, which puts them under a safety threat. So, if you require reasons why you must change the password, check out the ones we have mentioned;
The defaulting password is known by each person, particularly the hackers. In the bulk of cases, the defaulting password is “admin,” which is quite simple to guess. So, if someone accesses the network, they can lock you out and keep using the internet on their devices. Secondly, the default password lets anyone to fix to the network, resulting in unlawful connections on the network, resulting in slow internet speed. On a concluding note, make a routine to change the password after each three to four weeks. We expect this article helped you to change your Rockspace range.